Entryway Lighting Guide

Entryway lighting for the moment you come home.

Start with your ceiling height, what feels wrong after dark, and whether you can add wiring. We’ll show you which lighting layer to solve first.

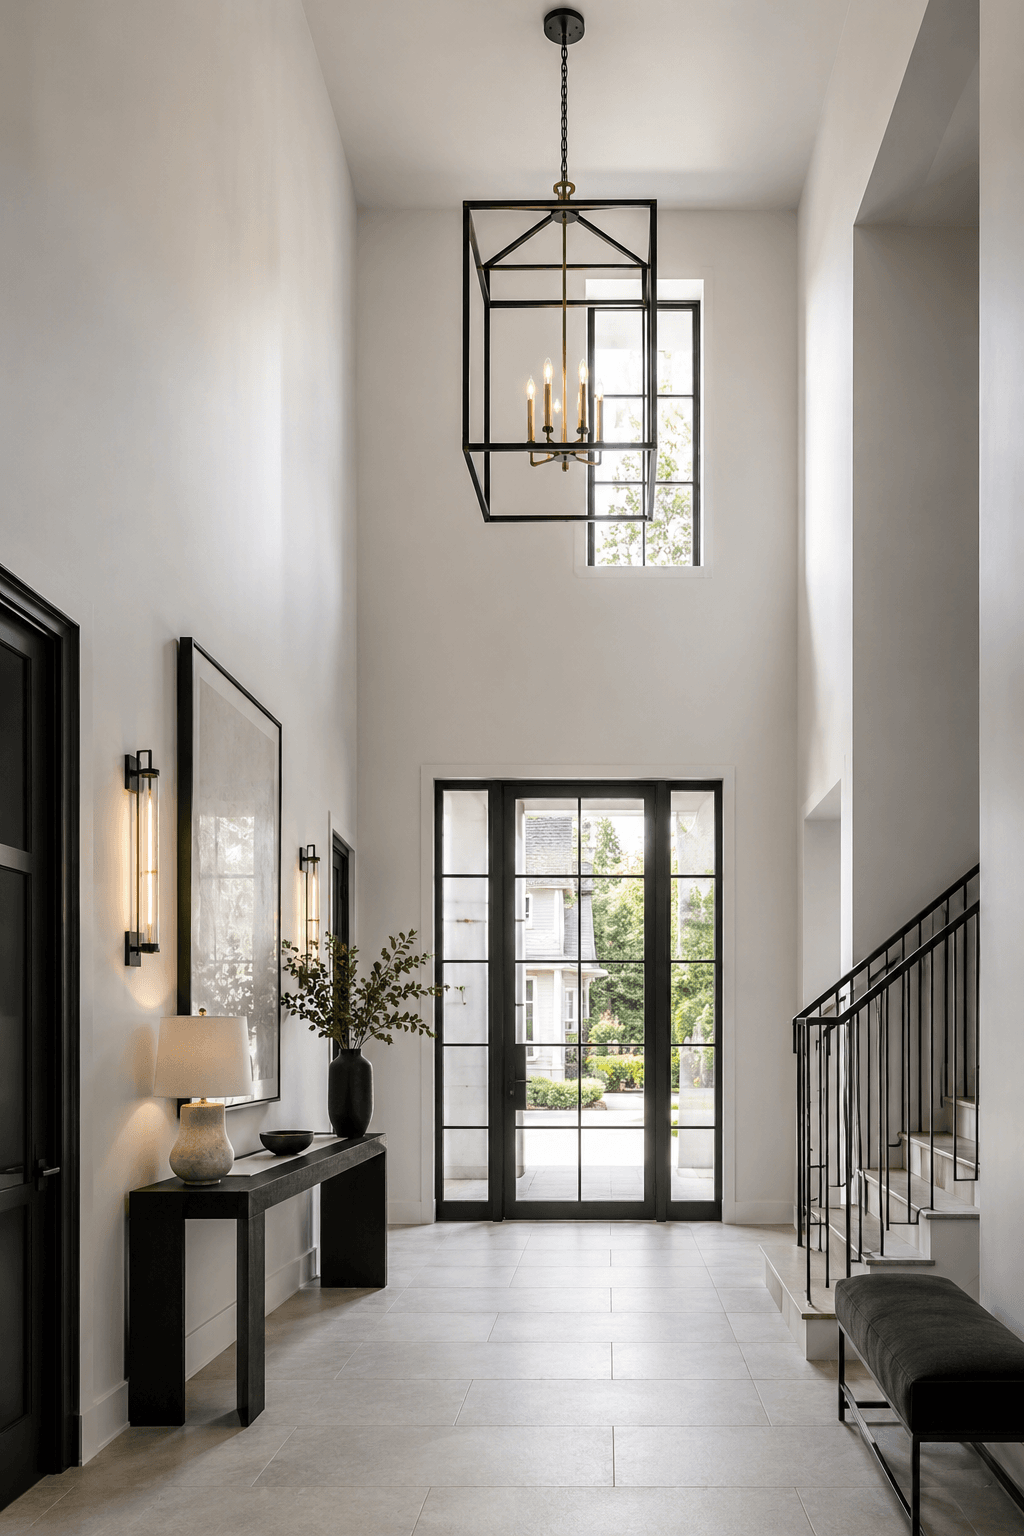
Modern entryway layered with ceiling, wall, mirror and console lighting
Why this room worksCeiling light handles the arrival. Wall and console light keep it from feeling flat.

What feels wrong?

Read the problem before the fixture.

Tap the closest description. The answer points to the lighting layer that deserves attention first.

Your first moveChoose the situation that feels most familiar.

You do not need to know fixture terminology first. Start with what the room is doing badly.

Fit Planner

Measure the room before the product page.

Use the result as a planning starting point, then verify the exact fixture dimensions, installation instructions and clearances on the live listing.

Build my starting plan

Your entryway starting point
8 × 11 ft · 9 ft ceilingStart with a compact semi-flush ceiling anchor.
FlushSemi-flushPendantStatement
Scale checkStart around 19 in
Add nextOne restrained wall or console layer
WatchDoor swing + lowest fixture point

Ceiling Fit Map

How much fixture can your entry actually hold?

Choose ceiling height and room shape. The visual route moves from true flush to a statement fixture as the room gains vertical volume.

1 · Ceiling height
2 · Entry shape
True flush
True flush
Semi-flush
Pendant / lantern
Vertical statement
Narrow entryway demonstrating ceiling, wall, art and low-level lighting layers
1 layer · usable, still flat

Build the Light in Layers

Choose the job before the fixture.

Tap a layer. The room does not need every source turned up at once; each one should solve a different visual problem.

Start with usable overall light.

The ceiling establishes the room's basic brightness and scale. Keep the profile appropriate to the height, then let another layer add depth.

Explore a compact ceiling route ↗

Three real-room routes

Build for the constraint you actually have.

The same product should not be forced into every entryway. These routes begin with ceiling height, wiring and room volume.

6 PM → 11 PM

Same room. Different job.

Entryway lighting should change with the moment instead of asking one bright ceiling source to do everything.
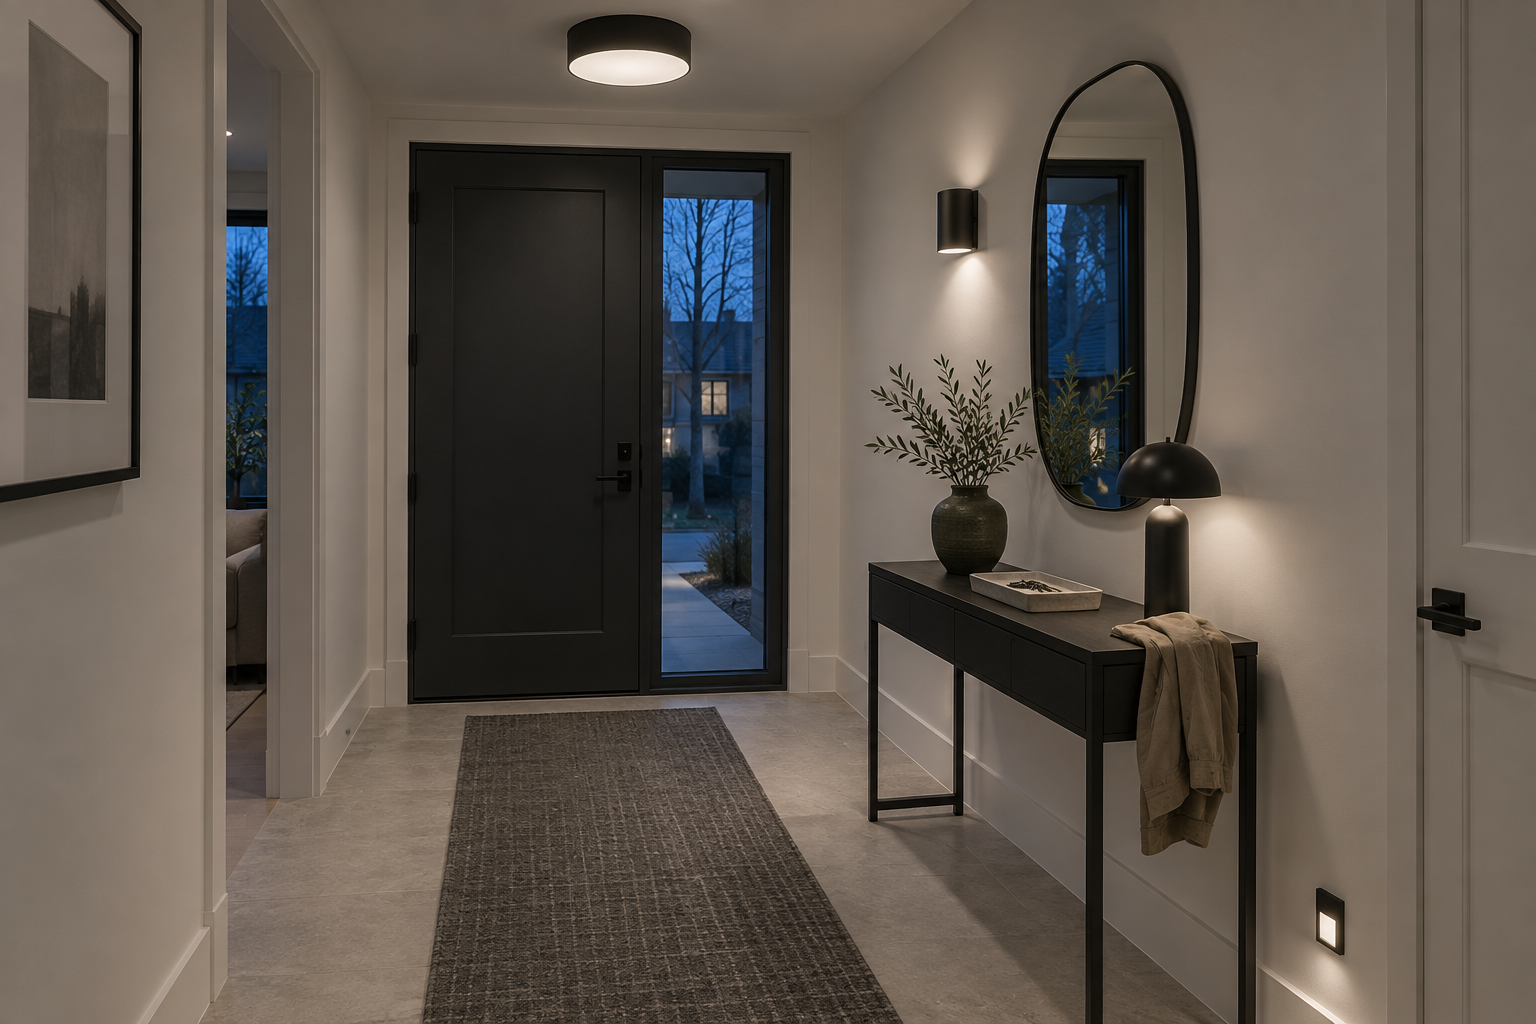
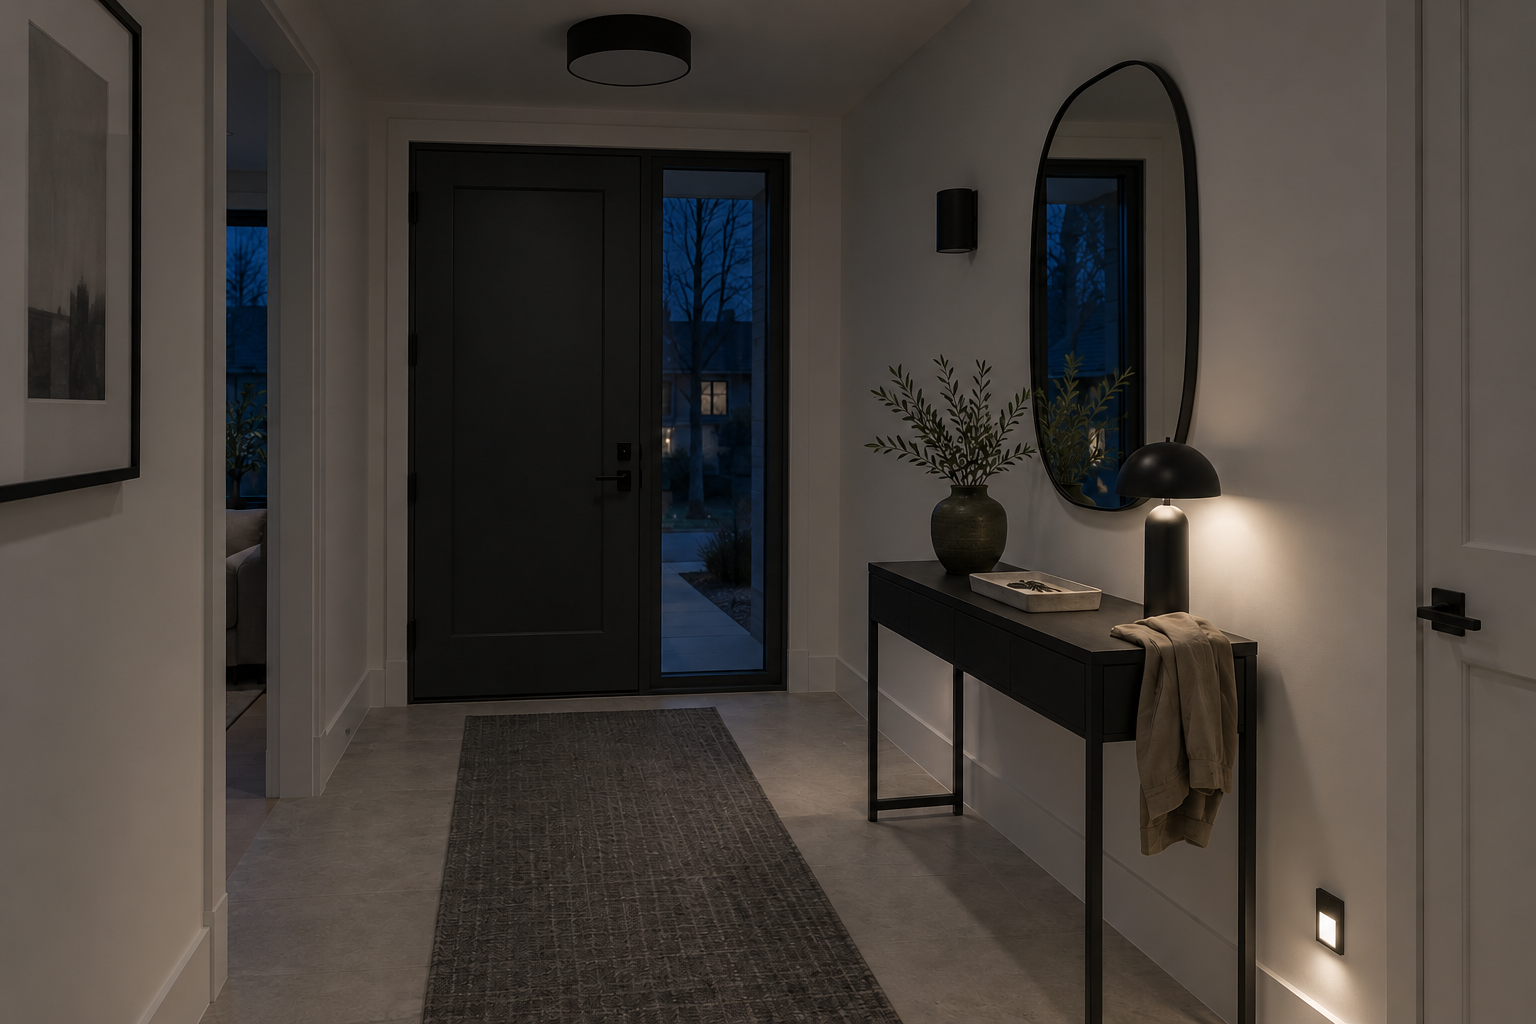
See the room. Find the keys. Read the entry.Ceiling and wall light handle the full arrival; the lower layer stays secondary.
See the products that build these layers →
Contemporary entryway at early evening using ceiling, wall and console lighting for a layered arrival sceneSame contemporary entryway late at night with the overhead light off and soft console and path lighting guiding the way
6 PM · ARRIVING

The Ravnora Decision Edit

Eight featured picks. Four different decisions.

Featured products are grouped by the job they perform, not by brand or decorative finish.

8 featured · 20 total
CeilingKeep the ceiling clear
Start hereStandard-height anchor

The Low-Ceiling Brass Anchor

For a compact entry that needs visible form without a long drop.

Check: total drop + door clearanceCheck fit & finish ↗
High-volume anchor

The Double-Height Foyer Statement

For a foyer where ordinary-size fixtures disappear into the vertical volume.

Check: suspension length + installation routeSee current options ↗
WallGive the wall dimension
Start herePermanent shallow layer

The Shallow Hardwired Wall Pair

For eye-level light where a deep shade would steal too much passage space.

Check: projection + junction-box positionExplore details ↗
Renter-friendly layer

The Rechargeable Wall Light for Renters

For adding wall-height light without committing to new wiring.

Check: mounting + recharge accessCheck available options ↗
Art + consoleMake one focal point glow
Start hereArtwork focus

The Artwork Light That Needs No Wiring

For bringing one artwork or gallery focal point back into the room after dark.

Check: artwork width + charging routeExplore the listing ↗
Quiet console glow

The Quiet Black Console Glow

For a softer landing light that stays visually secondary to the mirror or artwork.

Check: base footprint + charging methodSee available details ↗
After darkMake nighttime easier
Start hereLowest-commitment guidance

The Plug-In Night Guide

For a dark landing where automatic low light is enough and remodeling is not justified.

Check: outlet position + sensor viewCheck current options ↗
Permanent stair route

The Permanent Stairway Guide

For entry stairs where low-level guidance should become part of the architecture.

Check: wall boxes + installation needsCompare the configuration ↗

Fit Before Finish

Measure what the styled product photo cannot show.

The finish gets attention first. Clearance, projection and installation decide whether the fixture actually belongs in your entry.

ENTRY ELEVATION · CHECK BEFORE ORDERING
01 Lowest fixture point02 Door swing + walking path03 Sconce projection04 Console depth + outlet route
01 · HeightCeiling height + total dropMeasure to the fixture's lowest physical point, not only the canopy.
02 · CirculationDoor swing + walking clearanceCheck the actual moving path around the entrance and any stair landing.
03 · WallProjection at the deepest pointA beautiful sconce can still feel wrong if it narrows an already-tight passage.
04 · InstallationBox, mounting and power routeVerify what the exact product requires before treating the image as proof of fit.
05 · ControlDimming + compatibilityBulbs, integrated LEDs, smart controls and wall dimmers do not all behave the same way.
06 · VariantLive listing detailsConfirm the selected finish, included parts, dimensions and current configuration before purchasing.

Planning guidance only. Follow the manufacturer's instructions and use a qualified professional where electrical installation or local requirements call for one.

Complete 20-Light Library

Once you know the job, retrieve the exact route.

The full inventory is collapsed by function so the page stays useful instead of turning into an endless product grid.

Ceiling anchors · 6From true flush to double-height statement.
The Low-Ceiling Brass AnchorBest when a standard-height entry needs form without much drop.Check details ↗
The Soft-Glow Ceiling AnchorBest when diffused glass should soften the overhead source.Explore ↗
The True Low-Profile Ceiling FixBest when ceiling clearance matters more than vertical drama.Check fit ↗
The Open Lantern for a Taller ArrivalBest when the foyer needs visible structure without a heavy shade.See options ↗
The Paired Pendants for a Long EntryBest when the room is elongated and one centered point feels disconnected.Compare ↗
The Double-Height Foyer StatementBest when ordinary fixtures look lost from the floor.See current options ↗
Wall layers · 4Permanent and rechargeable ways to light vertical surfaces.
The Sculptural Wall GlowBest when the wall light should read as a visible decorative gesture.Explore details ↗
The Shallow Hardwired Wall PairBest when a narrow entry needs permanent eye-level light with restrained projection.Check fit ↗
The Rechargeable Wall Light for RentersBest when new wiring is off the table.Check options ↗
The Long Wall Light With No RewiringBest when a wider artwork, mirror edge or console composition needs one long line.See details ↗
Picture + art lighting · 2Focused light for the wall you want the eye to notice.
The Artwork Light That Needs No WiringBest when one artwork needs focus without opening the wall.Explore ↗
The Warm-Metal Art LightBest when the art layer needs to coordinate with warmer metal accents.Check details ↗
Console glow · 2Portable low light for keys, arrivals and evening calm.
The Quiet Black Console GlowBest when the lamp should stay visually secondary to the mirror or art.See details ↗
The Soft-Shade Console GlowBest when a softer shaded silhouette suits the landing surface.Explore ↗
Night + path lighting · 4Low guidance from removable to permanent.
The Night Path That Wakes Up With YouBest when several removable motion points are useful along the route.Check options ↗
The Hidden Under-Console GuideBest when practical light should disappear beneath furniture or a cabinet edge.Explore ↗
The Permanent Stairway GuideBest when low light should become part of the architecture.Compare ↗
The Plug-In Night GuideBest when an existing outlet can solve the dark landing with minimal commitment.See current options ↗
Controls · 2Change how the entry behaves without adding another decorative fixture.
The Arrival-Routine StarterBest when compatible smart bulbs can handle schedules, dimming and repeatable scenes.Check compatibility ↗
The Dimmer That Changes the ArrivalBest when wall-level dimming and control suit the existing fixture route.See configuration ↗

Entryway Lighting Questions

The five questions worth answering before you shop.

Flush or semi-flush for a low entryway ceiling?

Start with circulation. If any extra drop makes the room feel compressed or conflicts with doors and movement, a true flush profile is the safer visual route. If the ceiling can afford a little depth, semi-flush fixtures usually provide more decorative presence.

How do I choose an entryway light that does not look too small?

Use room dimensions only as an early scale check. Then look at ceiling height and total volume. A tall or double-height foyer often needs more visible vertical presence than a compact room with the same floor dimensions.

How can I light a narrow entry without making it feel tighter?

Keep overhead drop controlled and pay special attention to sconce projection. Use the wall for light, but choose a profile that does not physically enter the walking path more than the room can tolerate.

What can I use if I cannot hardwire wall lights?

Rechargeable sconces, cordless picture lights and portable console lamps can create a useful middle and low layer. The trade-off is maintenance: mounting, charging access and run time become part of the decision.

What should I measure before buying a foyer chandelier?

Confirm ceiling height, total fixture drop, the lowest point over the walking route, door and stair clearances, mounting support and the actual dimensions of the selected variant. For electrical work, follow the manufacturer's instructions and local requirements.

Scroll to Top